bake

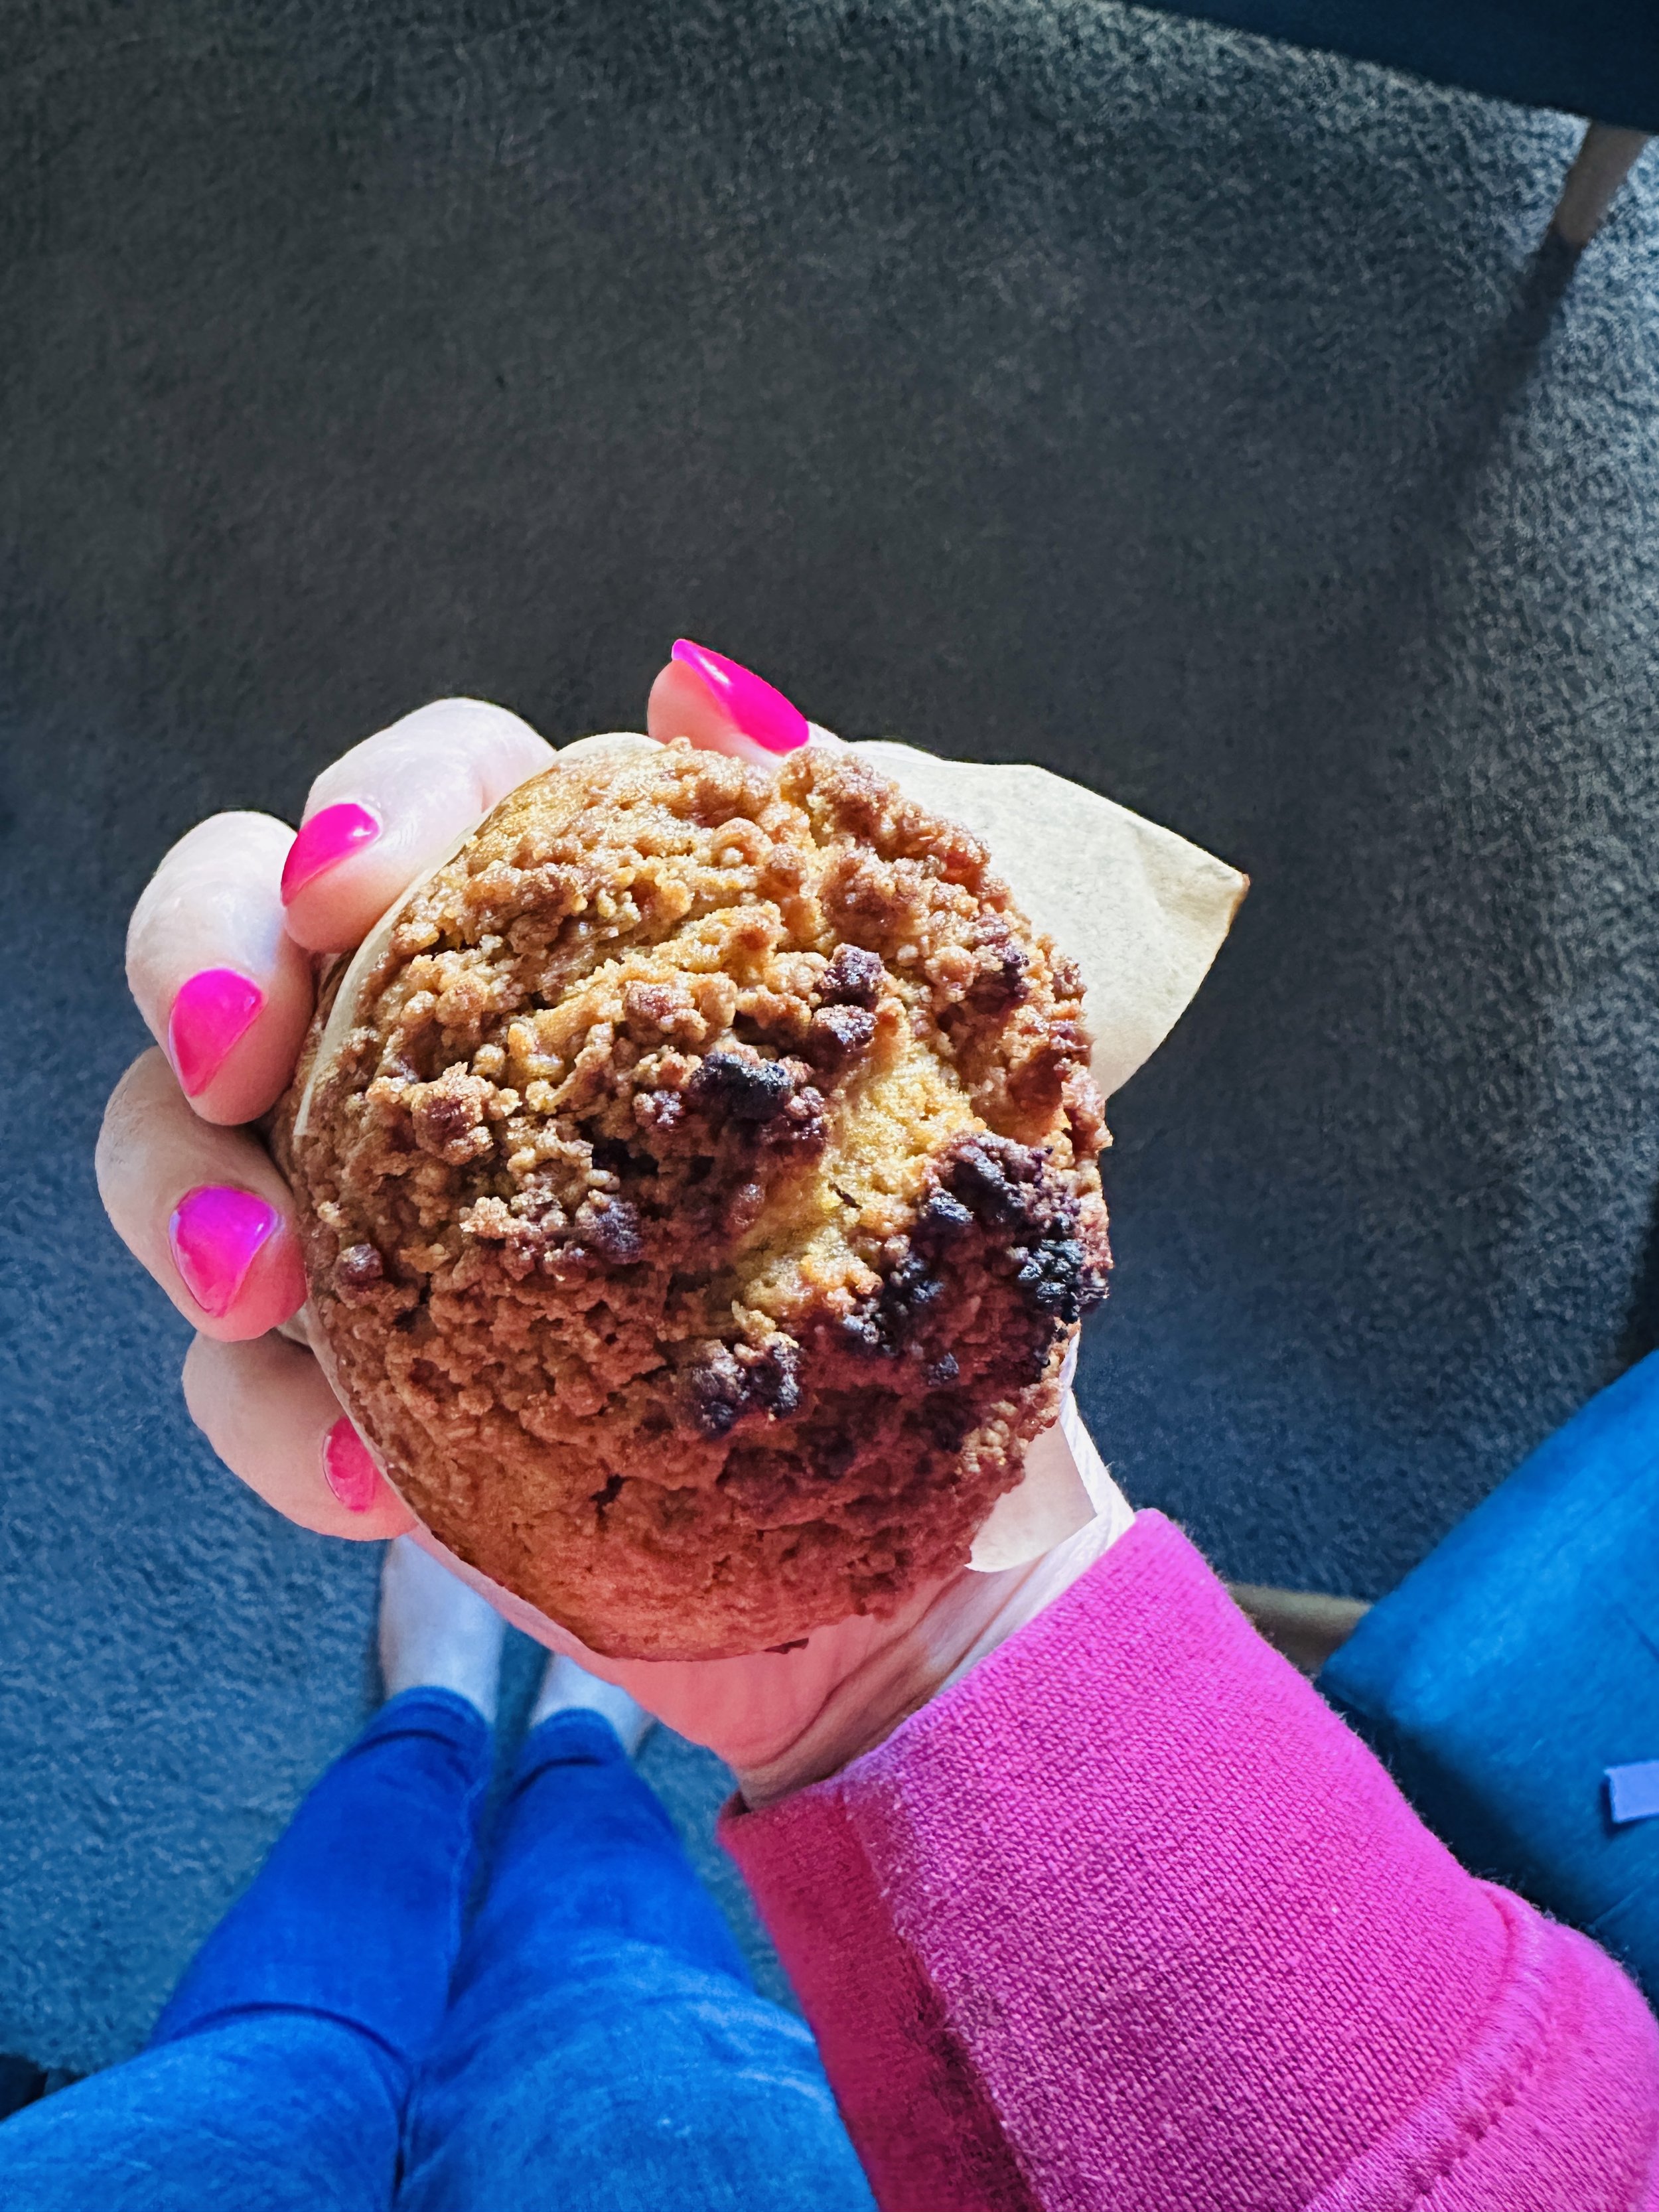
pear and blackberry streusel muffins (vegan)

In summer and autumn, one is spoiled for choice with different seasonal fruits to use in baking - but winter?

At the start of June, I bought a large box of the last of the blackberry harvest from a local farm. They have been sitting in the freezer, added to breakfast porridge and weekend crumbles, but I wondered about using them in something else. Pears are also plentiful in the supermarket at the moment, particularly the “Odd Bunch” ones, the imperfect specimens that come into their own in cakes, bakes, crumbles and smoothies.

I decided to try this particular wintry (or autumnal, strictly speaking, I suppose) fruit combination in these muffins and it was an absolute winner! Sharp yet sweet fruit set in a vanilla-heavy batter not unlike birthday cake, topped with an indulgent and moreish streusel mixture. Winter elevenses have never been so tasty!

You can of course use whatever fruit you prefer - any kind of berry, fresh or frozen, would work well in place of the blackberries and you could use apples interchangeably for the pears. You could also use all pear (or apple). You want 230g in total of fruit, whatever combination you end up using.

You could also add nuts to the streusel mix if you like - walnuts, almonds, hazelnuts or pecans would be lovely. Nuts can burn easily, though, so be careful!

Pear and blackberry streusel muffins

Inspired by The Full Helping (I love her recipes!)

Makes 6 jumbo “Texas” muffins, probably 12 regular sized ones

Streusel topping

65g plain flour
50g dark brown sugar
65g cold butter (I use a vegan one called Nuttelex Buttery)
1 teaspoon ground cinnamon or mixed spice (I used a Gewürzhaus blend called Hot Cross Bun Spice, which appears to be only available at Easter) [note: only use 1/2 teaspoon if you prefer a subtler cinnamon flavour]
A pinch of sea salt

Muffins

1.5 cups of frozen (or fresh) blackberries + 1 small pear, peeled and cored (230g fruit in total)
350g plain flour
1/2 teaspoon sea salt
1.5 teaspoons baking powder
1 teaspoon bicarb soda
320ml soy milk + juice of half a lemon (or buttermilk if not vegan), combined in a large jug + allowed to sit and coagulate for at least 5 minutes
120ml sunflower or vegetable oil
170g caster or raw sugar
2 teaspoons vanilla extract


Preheat your oven to 180 C and line your muffin tin with cases/liners or squares of baking paper you’ve cut to fit.

Blitz all streusel topping ingredients in a food processor using the pulse function until the mixture is combined and resembles breadcrumbs. Scrape out into a bowl and place in the freezer until the muffin mix is ready.

Just to note, the streusel mix makes way more than you need but it doubles as a crumble mixture, so keep it in the freezer for when you next feel like a crumble and you’ll have dessert in an instant. Half the quantities specified if you don’t want leftovers but you’ll probably have to make it by hand, smaller quantities are trickier to do in a food processor, I’ve found (certainly in mine!).

Prep your fruit for the muffins - peel, core and chop the pear into small pieces and measure out the blackberries. Set aside.

Combine the dry ingredients in a large bowl.

In the large jug where you’ve measured out your soy milk and lemon juice (or buttermilk if you’re not worried about this being dairy free), you should have a slightly thick and lumpy milk now. Use a small whisk to bring it all together, and then add the oil, sugar and vanilla. Whisk well to combine.

Make a well in the centre of the dry ingredients and add the contents of the jug. Mix it together very gently with a spatula until just combined - Delia Smith recommends doing it in a slow figure of eight and this is what I usually do. It’s fine if there are a few small lumps but you don’t want to over-mix otherwise the muffins will be tough, and who wants that?

When the mixture is nearly combined, add the fruit to the bowl and gently fold it in.

A hilarious moment from Schitt’s Creek which ensured I will never be able to say “fold it in” with a straight face ever again! | Source

Once everything is combined, divide the mixture between the muffin containers - I use my favourite giant Texas style pan which yields six muffins.

Sprinkle as much or as little as you like of the streusel mixture on top of each one - I erred on the side of generous.

Bake in the oven for 25-30 minutes depending on the size of your muffins - mine took 30 minutes for a skewer to come out clean. Start checking at around 20 minutes is usually my advice, depending on how hot your oven runs. You can always put them back in for a few minutes, but scorched muffins are a sorry sight indeed!

Allow to cool - they were great warm but I enjoyed them even more a day or two later when they were firmer. Keep them in a container and I’ve found they last very well, over a week - but at that stage, they benefit from a quick warm up in the oven or microwave.

Savour them with a cup of steaming tea or coffee, and revel in the many consolations of winter.

classic victoria sponge

victoria-sponge-cake-philippa-moore

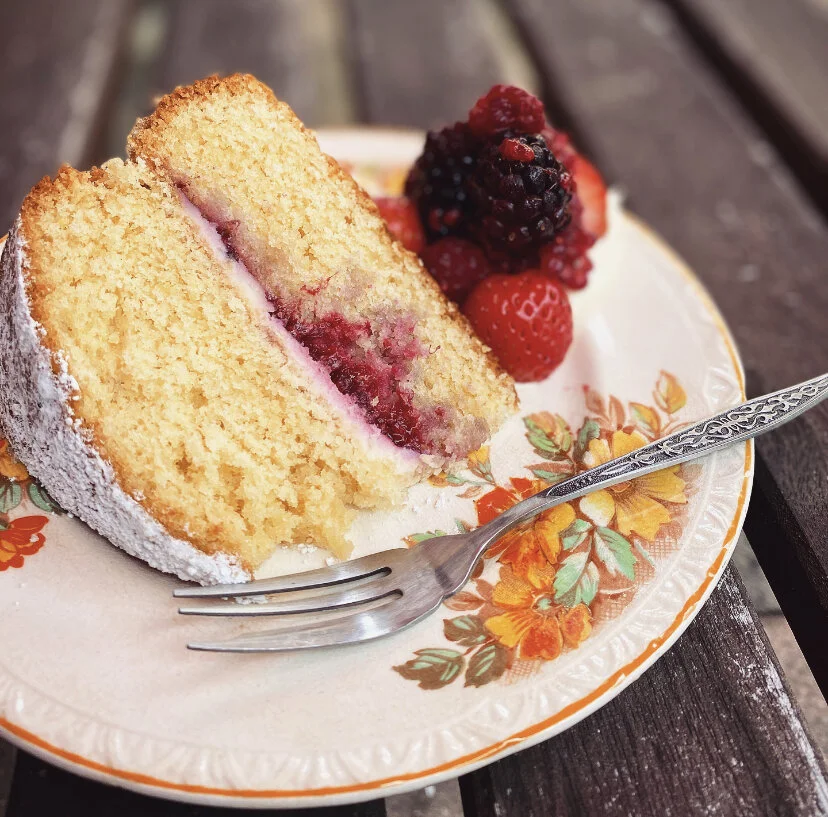
I got a KitchenAid mixer for Christmas from my lovely parents - which was a wonderful surprise - so I’ve been getting to know it by attempting to master my favourite cake. Tom and I are both quite partial to a Victoria sponge. In London, I had neither the equipment nor the time to make them regularly but, fortunately, there was a very reliable one we could buy at our local Sainsbury’s. But nothing beats homemade!

Last week my PhD supervisor and I took a little road trip - in the name of research but also for the Westerway Raspberry Farm, which is a quite delightful place. We picked a bucket each of raspberries and I’ve turned mine into gin (currently marinating in the pantry), breakfast yoghurt and granola parfaits, jam and as a filling for this delicious cake. One of my favourite tearooms in London, Drink Shop Do, did a lovely sponge cake with fresh raspberries in the filling. I took full advantage of the bucket of raspberries in my fridge to recreate it!

The wondrous thing about this cake is you can make the filling any flavour you please. Tom’s favourite so far is strawberry jam with buttercream icing (instead of cream), mine is blackcurrant jam with mascarpone (flavoured with a little Westerway blackcurrant syrup, our version of Ribena). I plan to try lemon curd next. The possibilities are endless.

And of course there will be those out there who will say a sponge cake is more the domain of experienced bakers - I gleefully ignore such snobbery and encourage beginners to give this a go! Whether it’s cake-making, piano or yoga, a regular practice is the best path to confidence.

Classic Victoria sponge

230g margarine (you can use unsalted butter if you prefer, but I was advised that margarine makes for a lighter sponge, and that has proved to be the case)
230g caster sugar
230g sifted self-raising flour (occasionally my hand has slipped and it’s ended up being 240g, but that’s fine)
2 teaspoons baking powder
1 teaspoon vanilla essence or extract
4 eggs

For the filling: your choice of jam and/or fresh fruit and cream/mascarpone or buttercream icing

Sifted icing sugar, for dusting

Preheat the oven to 190 C. Grease two 20cm round springform cake tins (sometimes they’re called “sandwich tins”) and line the bases with baking paper.

In a large bowl, or the bowl of your KitchenAid mixer, place all the ingredients and beat together for a few minutes until you have a smooth batter.

Divide the mixture evenly between the two tins (I use a digital scale - I usually get around 470g in each one). Smooth the tops with a spatula.

Bake in the oven for around 20 minutes until the cakes are golden brown and a skewer inserted into the centre comes out clean.

Remove from the oven, allow to cool slightly in the tin before turning out on to a rack to cool completely.

To assemble, spread the mascarpone, cream or buttercream icing over the bottom of one of the sponges. Top with jam and sandwich the second sponge, bottom side down, on top.

Dust the top with icing sugar before serving.

Store in an airtight container and eat within 2 days. Which will not be a problem - send word out to your family that a sponge cake has been made, and it will be gone in no time!


If you make any of my recipes, do tag me on Instagram at @travelling_philbury - I’d love to see!

peanut butter cookies with chocolate chips and sea salt

peanut-butter-choc-chip-sea-salt-cookies-philippa-moore

I don’t know what it is about the taste of peanut butter, but it has an almost Proustian effect on me.

As a child, I rejected every other sandwich filling for my school lunchbox. In fact, I rejected sandwiches most of the time - they were dull in taste and vomit-inducing in texture, the opposite of everything I wanted and believed food to be. So for most of primary school, my usual lunch was a bag of carrot sticks and peanut butter on crackers. Peanut butter became a familiar, quotidian taste and I found it far from exciting. Once I was old enough to make my own lunch for school, peanut butter was off the menu. I’d had enough to last a lifetime, or so I thought.

But as an adult, I’ve found tasting peanut butter again quite ambrosial. I love it on apple slices, on toast, in stir-fries, in smoothies or even by the spoonful.

Peanut butter also makes a divine and, with the addition of a sprinkle of sea salt, very adult biscuit. But the method is so simple a child could make them (with a little supervision). I find making biscuits such a faff that I was determined to make these in one bowl/pan. Success.

Be warned, these are incredibly addictive.

Peanut butter cookies with chocolate chips and sea salt

150g smooth peanut butter (I like Bega Just Nuts or Pic)
125g unsalted butter
65g rice malt syrup
125g brown sugar
1 egg
Splash of vanilla extract
100g desiccated coconut
270g plain flour
1/2 teaspoon bicarb soda
120g dark chocolate chips
Sea salt flakes, for sprinkling

Preheat oven to 180 C (fan-forced). Line two baking trays with baking paper.

Place the peanut butter, butter and rice malt syrup in a large saucepan (you will use this to make the whole mixture, so make sure it’s a big saucepan) over low heat. Stir occasionally until just melted. Turn off heat.

Add the brown sugar, egg and vanilla, and beat well until combined.

Add the coconut, flour and bicarb soda and stir to combine.

FInally, add the chocolate chips and stir until evenly distributed through the mixture.

Using a teaspoon and your hands, roll into balls of a size to your liking (just be consistent!) and place evenly spaced on the trays. Once all the mixture is used, use a fork to flatten the dough balls slightly.

Sprinkle the tops with a little sea salt (only a little - we’re not going for a hundreds and thousands look! Just a flake will do. Be restrained and judicious here). You could also put a few more choc chips on top (as I did).

Bake in the oven for roughly 8 minutes or until the biscuits are golden brown. For goodness sake set a timer, otherwise you’ll pull a groin muscle running to the oven to rescue them.

Allow to cool slightly on the trays, then transfer to a rack to cool completely. You can eat them warm(ish) but I think they’re at their best cool. They are “crisp yet fluffy”, as Tom described them.

Perfect with a cup of tea or (I imagine) crumbled over some vanilla ice cream.