easy baking

pear and blackberry streusel muffins (vegan)

In summer and autumn, one is spoiled for choice with different seasonal fruits to use in baking - but winter?

At the start of June, I bought a large box of the last of the blackberry harvest from a local farm. They have been sitting in the freezer, added to breakfast porridge and weekend crumbles, but I wondered about using them in something else. Pears are also plentiful in the supermarket at the moment, particularly the “Odd Bunch” ones, the imperfect specimens that come into their own in cakes, bakes, crumbles and smoothies.

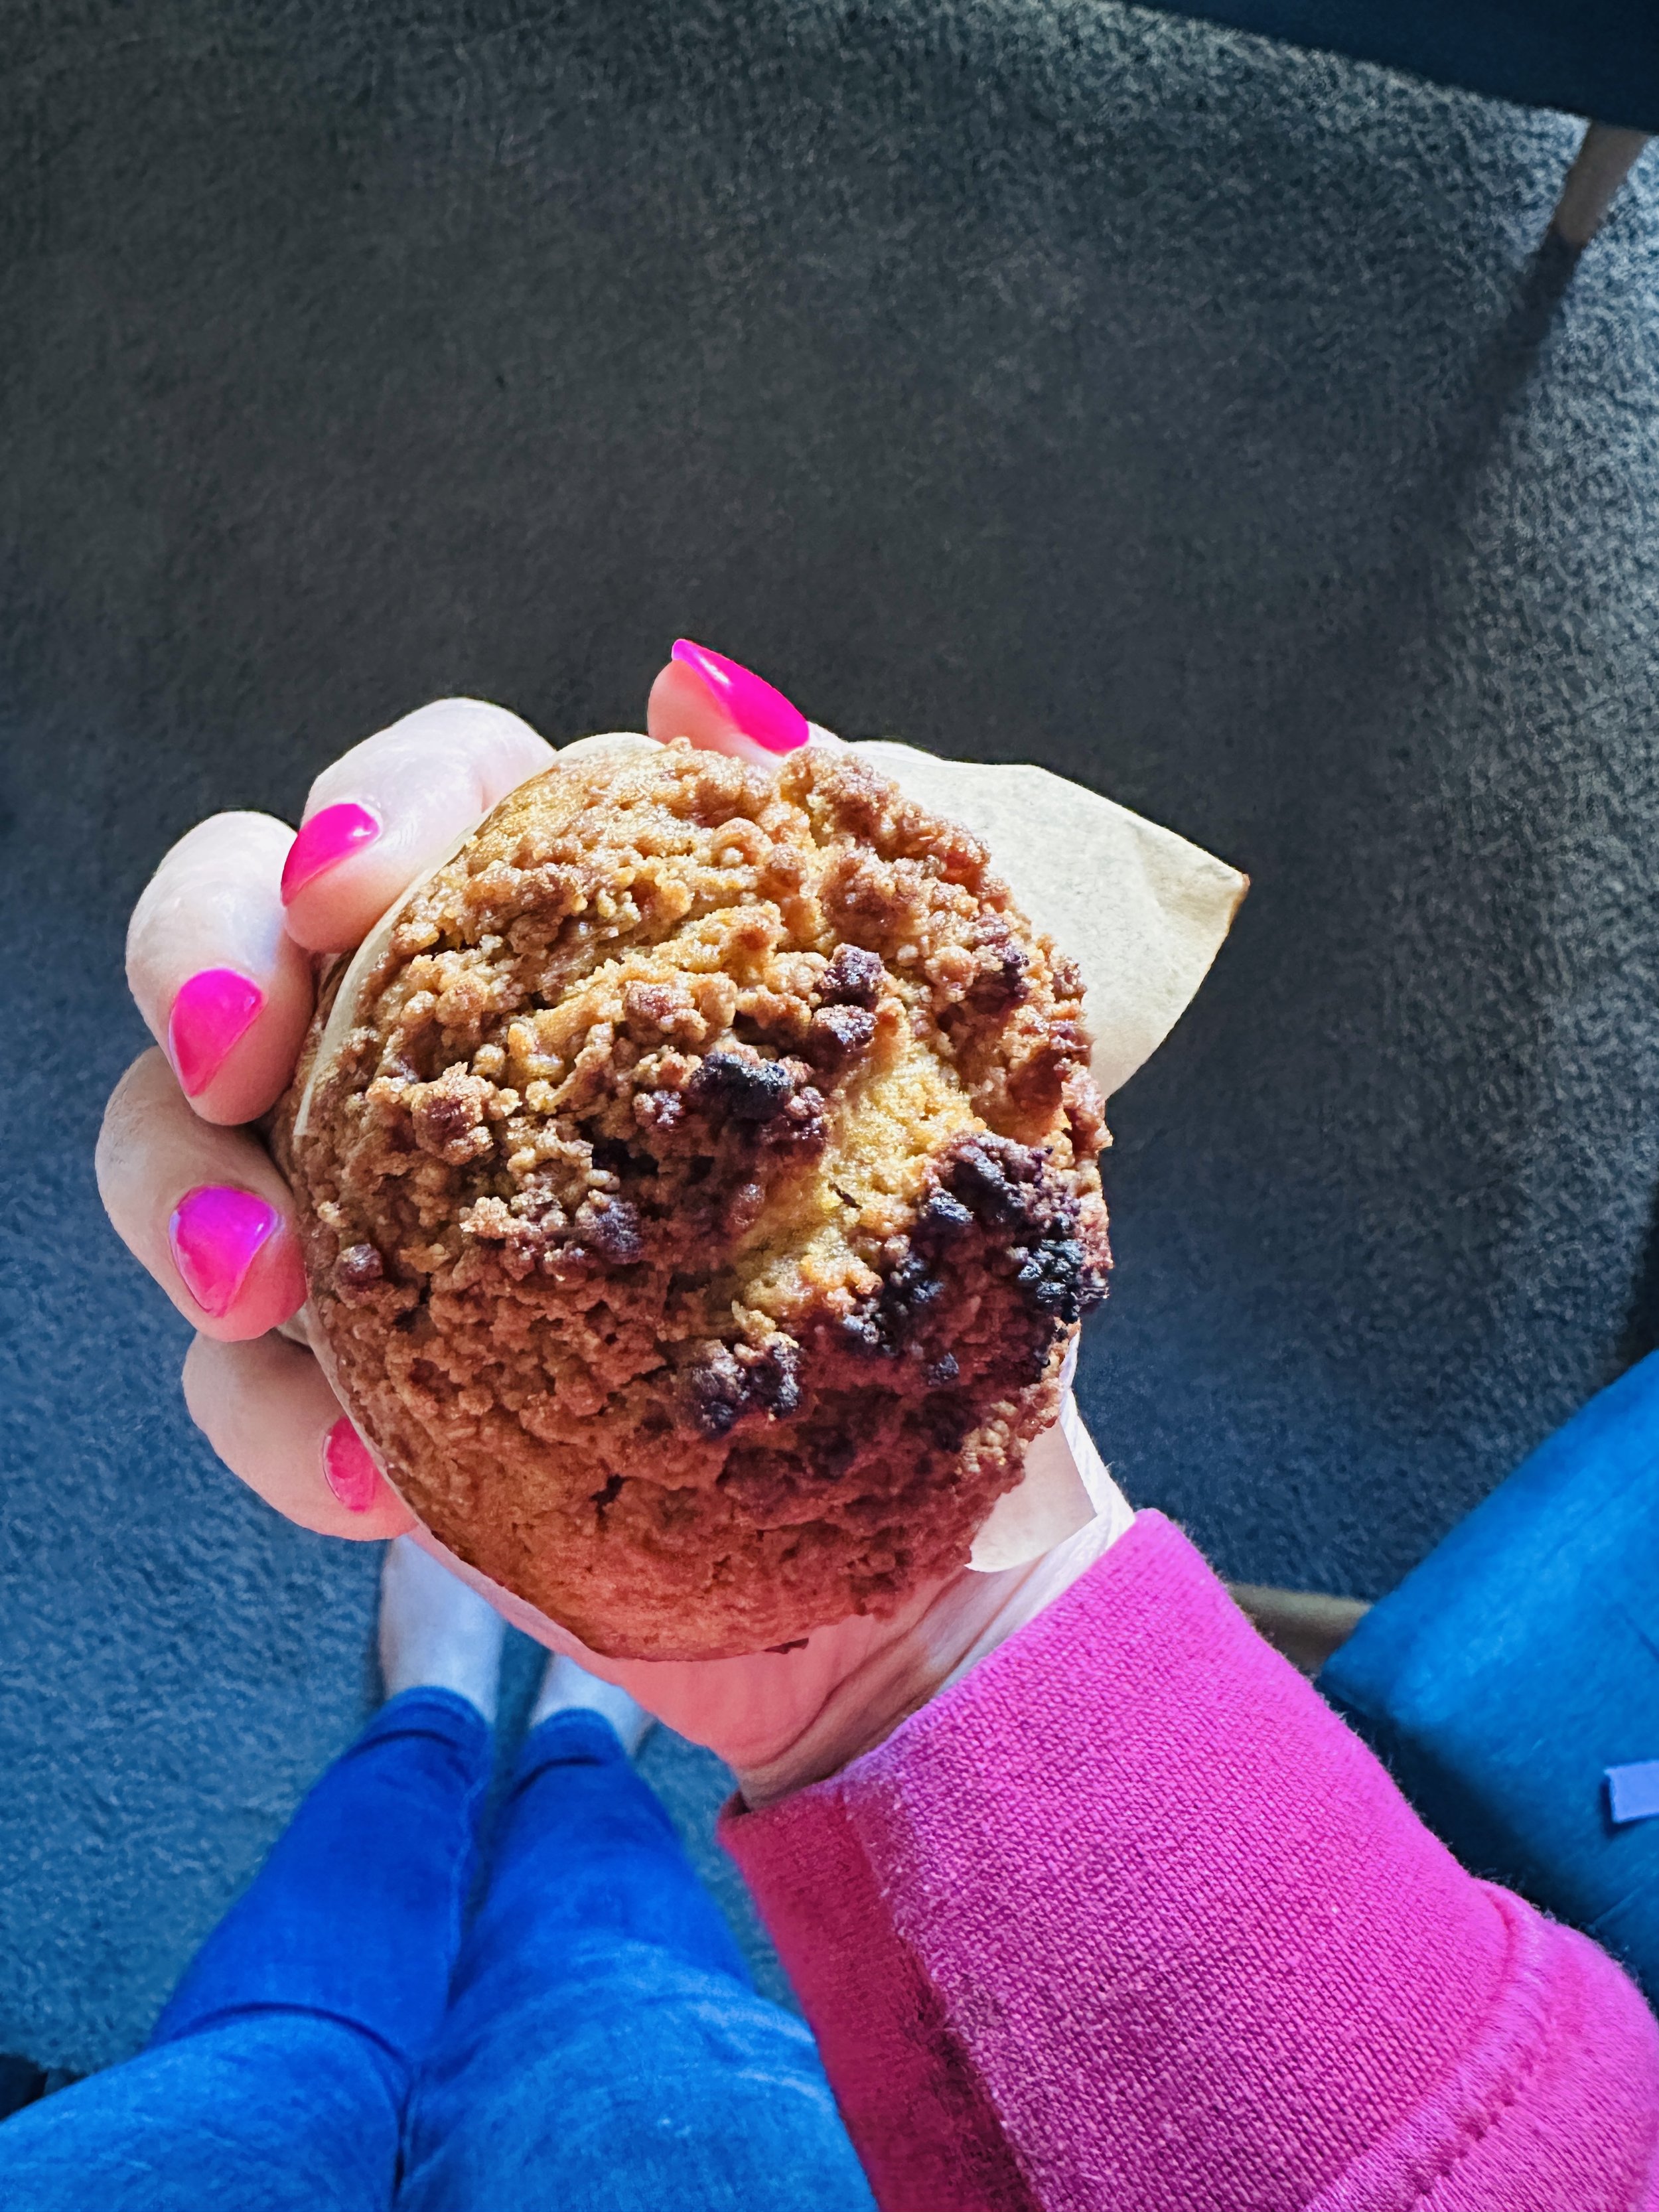
I decided to try this particular wintry (or autumnal, strictly speaking, I suppose) fruit combination in these muffins and it was an absolute winner! Sharp yet sweet fruit set in a vanilla-heavy batter not unlike birthday cake, topped with an indulgent and moreish streusel mixture. Winter elevenses have never been so tasty!

You can of course use whatever fruit you prefer - any kind of berry, fresh or frozen, would work well in place of the blackberries and you could use apples interchangeably for the pears. You could also use all pear (or apple). You want 230g in total of fruit, whatever combination you end up using.

You could also add nuts to the streusel mix if you like - walnuts, almonds, hazelnuts or pecans would be lovely. Nuts can burn easily, though, so be careful!

Pear and blackberry streusel muffins

Inspired by The Full Helping (I love her recipes!)

Makes 6 jumbo “Texas” muffins, probably 12 regular sized ones

Streusel topping

65g plain flour
50g dark brown sugar
65g cold butter (I use a vegan one called Nuttelex Buttery)
1 teaspoon ground cinnamon or mixed spice (I used a Gewürzhaus blend called Hot Cross Bun Spice, which appears to be only available at Easter) [note: only use 1/2 teaspoon if you prefer a subtler cinnamon flavour]
A pinch of sea salt

Muffins

1.5 cups of frozen (or fresh) blackberries + 1 small pear, peeled and cored (230g fruit in total)
350g plain flour
1/2 teaspoon sea salt
1.5 teaspoons baking powder
1 teaspoon bicarb soda
320ml soy milk + juice of half a lemon (or buttermilk if not vegan), combined in a large jug + allowed to sit and coagulate for at least 5 minutes
120ml sunflower or vegetable oil
170g caster or raw sugar
2 teaspoons vanilla extract


Preheat your oven to 180 C and line your muffin tin with cases/liners or squares of baking paper you’ve cut to fit.

Blitz all streusel topping ingredients in a food processor using the pulse function until the mixture is combined and resembles breadcrumbs. Scrape out into a bowl and place in the freezer until the muffin mix is ready.

Just to note, the streusel mix makes way more than you need but it doubles as a crumble mixture, so keep it in the freezer for when you next feel like a crumble and you’ll have dessert in an instant. Half the quantities specified if you don’t want leftovers but you’ll probably have to make it by hand, smaller quantities are trickier to do in a food processor, I’ve found (certainly in mine!).

Prep your fruit for the muffins - peel, core and chop the pear into small pieces and measure out the blackberries. Set aside.

Combine the dry ingredients in a large bowl.

In the large jug where you’ve measured out your soy milk and lemon juice (or buttermilk if you’re not worried about this being dairy free), you should have a slightly thick and lumpy milk now. Use a small whisk to bring it all together, and then add the oil, sugar and vanilla. Whisk well to combine.

Make a well in the centre of the dry ingredients and add the contents of the jug. Mix it together very gently with a spatula until just combined - Delia Smith recommends doing it in a slow figure of eight and this is what I usually do. It’s fine if there are a few small lumps but you don’t want to over-mix otherwise the muffins will be tough, and who wants that?

When the mixture is nearly combined, add the fruit to the bowl and gently fold it in.

A hilarious moment from Schitt’s Creek which ensured I will never be able to say “fold it in” with a straight face ever again! | Source

Once everything is combined, divide the mixture between the muffin containers - I use my favourite giant Texas style pan which yields six muffins.

Sprinkle as much or as little as you like of the streusel mixture on top of each one - I erred on the side of generous.

Bake in the oven for 25-30 minutes depending on the size of your muffins - mine took 30 minutes for a skewer to come out clean. Start checking at around 20 minutes is usually my advice, depending on how hot your oven runs. You can always put them back in for a few minutes, but scorched muffins are a sorry sight indeed!

Allow to cool - they were great warm but I enjoyed them even more a day or two later when they were firmer. Keep them in a container and I’ve found they last very well, over a week - but at that stage, they benefit from a quick warm up in the oven or microwave.

Savour them with a cup of steaming tea or coffee, and revel in the many consolations of winter.

classic victoria sponge

victoria-sponge-cake-philippa-moore

I got a KitchenAid mixer for Christmas from my lovely parents - which was a wonderful surprise - so I’ve been getting to know it by attempting to master my favourite cake. Tom and I are both quite partial to a Victoria sponge. In London, I had neither the equipment nor the time to make them regularly but, fortunately, there was a very reliable one we could buy at our local Sainsbury’s. But nothing beats homemade!

Last week my PhD supervisor and I took a little road trip - in the name of research but also for the Westerway Raspberry Farm, which is a quite delightful place. We picked a bucket each of raspberries and I’ve turned mine into gin (currently marinating in the pantry), breakfast yoghurt and granola parfaits, jam and as a filling for this delicious cake. One of my favourite tearooms in London, Drink Shop Do, did a lovely sponge cake with fresh raspberries in the filling. I took full advantage of the bucket of raspberries in my fridge to recreate it!

The wondrous thing about this cake is you can make the filling any flavour you please. Tom’s favourite so far is strawberry jam with buttercream icing (instead of cream), mine is blackcurrant jam with mascarpone (flavoured with a little Westerway blackcurrant syrup, our version of Ribena). I plan to try lemon curd next. The possibilities are endless.

And of course there will be those out there who will say a sponge cake is more the domain of experienced bakers - I gleefully ignore such snobbery and encourage beginners to give this a go! Whether it’s cake-making, piano or yoga, a regular practice is the best path to confidence.

Classic Victoria sponge

230g margarine (you can use unsalted butter if you prefer, but I was advised that margarine makes for a lighter sponge, and that has proved to be the case)
230g caster sugar
230g sifted self-raising flour (occasionally my hand has slipped and it’s ended up being 240g, but that’s fine)
2 teaspoons baking powder
1 teaspoon vanilla essence or extract
4 eggs

For the filling: your choice of jam and/or fresh fruit and cream/mascarpone or buttercream icing

Sifted icing sugar, for dusting

Preheat the oven to 190 C. Grease two 20cm round springform cake tins (sometimes they’re called “sandwich tins”) and line the bases with baking paper.

In a large bowl, or the bowl of your KitchenAid mixer, place all the ingredients and beat together for a few minutes until you have a smooth batter.

Divide the mixture evenly between the two tins (I use a digital scale - I usually get around 470g in each one). Smooth the tops with a spatula.

Bake in the oven for around 20 minutes until the cakes are golden brown and a skewer inserted into the centre comes out clean.

Remove from the oven, allow to cool slightly in the tin before turning out on to a rack to cool completely.

To assemble, spread the mascarpone, cream or buttercream icing over the bottom of one of the sponges. Top with jam and sandwich the second sponge, bottom side down, on top.

Dust the top with icing sugar before serving.

Store in an airtight container and eat within 2 days. Which will not be a problem - send word out to your family that a sponge cake has been made, and it will be gone in no time!


If you make any of my recipes, do tag me on Instagram at @travelling_philbury - I’d love to see!

fig and ricotta cake

fig-and-ricotta-cake-philippa-moore

This autumn has been all about the quince, but last year it was all about the fig. There were a few figs getting jammier by the day on my parents’ tree and we needed to pick them before the possums got to them. I made a delightful pear and fig chutney, and this cake.

You can use any plain soft creamy cheese in place of the ricotta - I used half goats cheese and half ricotta, which worked splendidly.

I really loved this cake because it wasn’t too sweet and allowed the natural sweetness of the figs to shine through. My parents, who like things sweeter, weren’t that fussed - so by all means add more sugar if you have a similar palate!

Autumnal slightly savoury fig and ricotta cake

Based on a recipe in Books for Cooks Favourite Recipes 4, 5 and 6

2 tablespoons caster sugar
6 fresh ripe figs, stalks trimmed, cut in half
175 g unsalted butter
150 g caster sugar
1 teaspoon vanilla extract
200 g ricotta (or a combination of ricotta and soft goats cheese)
2 large eggs
175 g plain flour
1 tablespoon baking powder
A little apricot jam, for glazing

Preheat the oven to 180 C (fan-forced). Grease and line a 24cm springform cake tin. Butter the baking paper on the base of the tin and sprinkle with the 2 tablespoons of caster sugar. Arrange the halved figs, cut side down, over the sugar.

Beat the butter, sugar, vanilla and ricotta (or other cheese you’re using) together until creamy and fluffy. Beat in the eggs one at a time. Add the flour and baking powder and gently fold in.

Spread the batter carefully over the figs.

Bake in the oven until golden and a skewer inserted into the middle comes out clean - roughly 40-45 minutes, depending on the strength of your oven. Leave to cool completely in the tin.

To decorate, turn out the cake on to a plate or stand, fig side up. Melt the apricot jam over a low heat until soft and liquid, then brush over the top of the cake. The figs will glisten beautifully.

You can dust the top with icing sugar once you’ve glazed too, but I didn’t.

Cut into slices and enjoy with a hot cup of tea.

My figs were quite little! Hope yours are bigger.

My figs were quite little! Hope yours are bigger.


spiced zucchini and apple loaf

Might not look like much - but it’s good!

Might not look like much - but it’s good!

I’m making the most of my zucchini glut, as I’m sure you’ve been able to tell!

I’m trying to ration my eggs and butter carefully at the moment, so I decided to make this cake vegan and see what the results were. And it was spectacular.

It’s a supremely moist cake anyway, thanks to the zucchini, but with the apple sauce involved too, the outside of the loaf is crusty and the middle is almost custardy. So it’s perfect for dessert as well as alongside your morning or afternoon cup of coffee.

And don’t skimp on the spices - it may seem like a lot but the whole point is that the flavour of the spices is very pronounced in this cake. If you prefer the flavours to be subtler, halve the quantities I’ve listed below. You can use any combination of baking spices you like (mixed spice, ground nutmeg, etc) but what I’ve listed below was a particularly good combination, for a spice lover like me. I’d never put black pepper in a cake before and was amazed by how just three turns of the pepper grinder gave it such a pleasant heat.

I hope you give it a try!

Spiced zucchini and apple loaf

Inspired by a similar recipe in A Basket By the Door by Sophie Hansen

Roughly 500g grated zucchini (courgette), about 3 large ones (you can even use marrow, just cut the woolly middle bit out first)
250g wholemeal plain flour or wholemeal spelt flour
2 teaspoons baking powder
2 teaspoons ground cinnamon
2 teaspoons ground ginger
1 teaspoon ground cloves
A generous grating of fresh nutmeg
3 turns of the black pepper grinder
A pinch of salt
1 teaspoon vanilla extract
200g brown sugar
6 heaped tablespoons apple sauce or puree
100ml olive oil

Preheat the oven to 180 C (fan-forced). Grease and line a large loaf tin or two small ones.

Squeeze as much liquid out of the grated zucchini as you can.

Place the squeezed grated zucchini in a bowl and add the flour, spices and salt, stir to combine. Add the vanilla, brown sugar, apple sauce and oil, and stir together until well combined (though try not to overmix, naturally).

Pour the batter into your prepared tin or tins, and bake in the oven for 1 hour or until a skewer inserted into the centre comes out clean. My oven is hotter than most so I checked mine after 45 minutes.

Allow the loaf to cool slightly then remove from the tin on to a cake rack to cool completely.

As it makes a large loaf, or two small ones, you can also happily freeze it in slices to defrost in the toaster whenever you need some comforting home-baked goodness. Which, let’s face it, in the times of coronavirus, is pretty much every day!

Enjoy it fresh or toasted, spread with butter, ricotta or left plain, and absolutely with a steaming cup of tea or coffee alongside.


five breads that are easy to make at home

Well, this isn’t quite the content I thought I’d be writing in March 2020. What strange, frightening times we’re living in at the moment.

I live in a small city where not a great deal changes, but nowhere, it seems, is immune to what is going on. Yesterday, I walked (I didn’t dare take the car) to a supermarket a few kilometres away. I was horrified by what I saw. Signs everywhere announcing restrictions on purchases, and that abuse to staff wouldn’t be tolerated (as it shouldn’t be, but it’s sad that people’s conduct necessitates such reminders). Crowds. Trolleys. People grabbing what they could, from bare shelves.

Most confronting of all was seeing an elderly couple, perhaps in their late seventies, with masks on, pushing their trolley together, looking terrified. It was heartbreaking. I got what I’d come for (the upside to taking soy milk in your coffee, it’s always there!) and then had a bit of a cry on the walk home. Fortunately, it had started to rain by then.

Australia is one of the most self-sufficient countries in the world when it comes to food. Nothing was going to completely run out any time soon - it’s because of the panic-buying that stocks have dwindled and the shelves are empty. And the elderly, the disabled, the most vulnerable in our communities - they are the ones suffering. It’s a disgrace.

Yet, at the same time, I understand why people have panicked. If you know something is in short supply, or going to be, it’s natural to want to get as much as you can, so your needs will be taken care of. It’s natural, when everything is so uncertain, to want to control what you can, to feel safe and prepared.

Every day I have to remind myself that the tightness in my chest is anxiety and panic, not the onset of the virus. I work from home 90% of the time anyway, but I am finding myself restless, unable to focus for long periods of time.

In times of stress, I turn to food, in a good way. Reading about it is soothing. Cookbooks have replaced dystopian fiction as my bedtime reading - the latter feels all too real at the moment.

And I love to cook. I can make bread, I can preserve a glut of fresh fruit and vegetables, I can make nourishing and delicious meals from the bare minimum of ingredients. Right now, it feels like those skills are very, very valuable. I am grateful to have them.

I’m also grateful for my vegetable garden which, in early autumn for us here, is still giving us silverbeet, cavolo nero and zucchini like nobody’s business. There’s even a few tomatoes left on the vine. And Tom’s work colleague gave us extra from her garden - rhubarb, carrots, apples, chillies - in exchange for some of my famous apricot and date chutney (recipe coming soon!). So we have plenty. The key is to use it well.

In a bid to be useful, I thought I’d share some cooking from the pantry ideas - as well as any interesting and helpful resources that I stumble upon.

Let’s start with bread.

I’m not surprised that one of the things that’s hardest to find in the supermarkets at the moment is flour. Because if you have flour, you can make countless things, including bread. And making bread is, in my opinion, one of the most useful skills you can ever learn.

And it doesn’t have to be complicated. I love to cook but I absolutely hate getting my hands dirty, getting dough in my fingernails or in my wedding rings, that kind of thing. Therefore, easy breads are the order of the day around here. Preferably no kneading!

These five are my absolute favourite breads to make at home. And perhaps apart from number 4, the flours are interchangeable. Use what you have! It will be slightly different of course but it will still be edible and that’s what matters!

1) Leftover porridge bread

philippa-moore-porridge-bread

I found myself with half a saucepan of porridge leftover from our breakfast last week, when things were still relatively normal. If it were just a spoonful or two, I’d just put it in our compost but it looked like enough for another serve, at least. I abhor waste but cold porridge was not appealing. I seemed to remember reading a recipe for bread you could make with leftover porridge, so I googled it and there it was! The brainchild of Claire Thomson, this bread is absolutely magnificent. Tom and I devoured it. Perfect with butter and jam, or just plain. It’s even nicer if your porridge was made with a hint of cinnamon in it, as ours was!

2) Seedy soda bread

philippa-moore-seedy-soda-bread

I have been making this bread for years. It’s one of the easiest things in the world to make - I’ve even made it when recovering from the flu. No yeast, the lovely tang of bicarb soda and the goodness of seeds. You can add raisins or sultanas too if you like, but as my husband is averse to dried fruit, I go for all seeds. It’s amazing with ricotta and jam, or just plain.

3) Dutch oven bread

philippa-moore-dutch-oven-bread

Everyone’s heard of this one, surely? There are many recipes from it, including one from the New York Times, but the one I’ve linked to is the one I’ve used the most. Lots of useful tips if you’re a first-timer. This is a bread I make all the time. Again, no kneading involved but just a longer prove so you’ll have to be a bit organised with this one and start it the night before. You can also add some sourdough starter to it if you have some. It tastes like you’ve put way more effort into it than you actually have!

4) Easy gluten-free bread

philippa-moore-gluten-free-bread-avocado-chilli

I don’t make this as often as I used to, as I find gluten-free flour more expensive here in Australia than it was in the UK (or maybe it’s because I still see the £ sign instead of $?) but it’s still a lovely easy loaf to make when you want a GF option. It’s more like making a cake than a loaf of bread, really. And if you have a breadmaker, like I do, there’s practically no labour involved at all!

I love it a day old, toasted, smothered with avocado and chilli, like the picture!

5) Banana bread

philippa-moore-banana-bread

Counts as a bread, surely? If you’ve got lots of bananas to use up at home, look no further. Super easy and absolutely delicious. We all need a sweet treat right now, I think.

I hope you enjoy these and please let me know if you try any of them!

Stay well and hopeful my friends xx